Italiano
 English
How to geotag photos
What is geotagging?
allows to associate each photo to its own geographical coordinates (latitude, longitude and altitude) so to be able to organize and visualize them on maps. Geotagging is specially interesting for people on holidays or who take a trip, by foot, by bike or by car: even after many years we could know exactly where we took each photo.
There are several ways to geotag a photo:
- First way is to search into a map the exact point where the photo was taken and then manually insert the geographical coordinates. Obviously is a long, uncomfortable and boring method. Furthermore it is really easy to make some mistakes because we have to rely on our memory.
- A second option is to use a camera with an integrated GPS receiver, as the iPhone. Unfortunately the iPhone camera doesn’t permit us to take high quality pictures and almost all the digital cameras on sales doesn’t have the GPS receiver.
- There is a third solution: to use EasyTrails GPS for geotag in an easy and accurate way the photos taken with our favourite camera, doesn’t matter if reflex or compact.
But how does it works? It is really easy: task of EasyTrails GPS is to record the route, called track, we do. So we can know accurately where we are every moment. We just have to cross-check the time we took the photo with the data of the track. Obviously we don’t have to do it manually: there are really good free softwares that can do it. Let’s see how.
Get on to practice
Let’s take our camera and synchronize its clock with the one of the iPhone. This is not necessary, because we may correct possible differences later on, as we will see, but it makes everything easier.
Now launch EasyTrails GPS, start the recording, and place the iPhone where we prefer (in the bag, in the rucksack, in a pocket,…) and let’s go take photos with ours favourite camera.
Once we are back at home we download all the pictures in a folder of our computer, together with the track recorded with EasyTrails GPS, exported in GPX format.
Now we can use one of these softwares:
- GeoSetter (Windows).
- GPSPhotoLinker (Mac OS X).
- GPicSync (Windows and Linux).
- HoudahGeo (Mac OS X).
Now we are going to see how to use Geosetter, bearing in mind that the operations to do are really similar also for the other software.
Using Geosetter
- Choose the folder with the photos.
- Select all the photos to geotag.
- Click on “synchronize with GPS data file”.
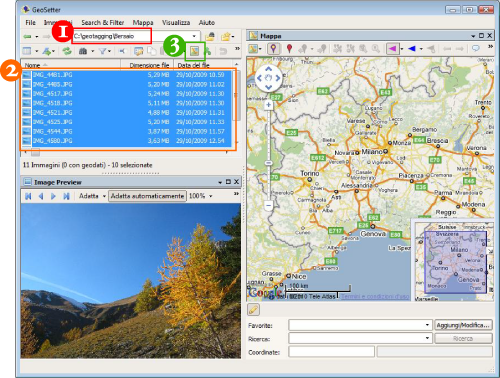
At this point this screen will open:
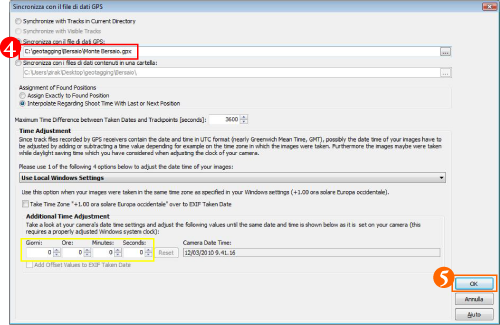
As we can see, in the yellow box is possible to modify the potential differences of clocks between iPhone and camera. If we have already synchronized them we just have to do:
- Choose the GPX file recorded with EasyTrails GPS.
- Click the OK button in the bottom right.
- Confirm clicking OK in the dialog box that will appear.
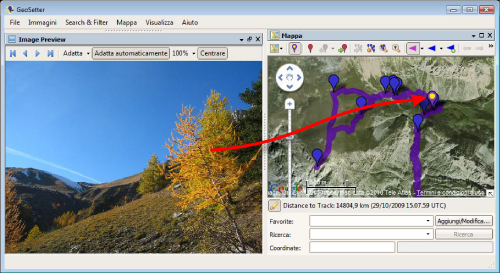
The map with the route we did will appear, with the places we took photos in evidence:
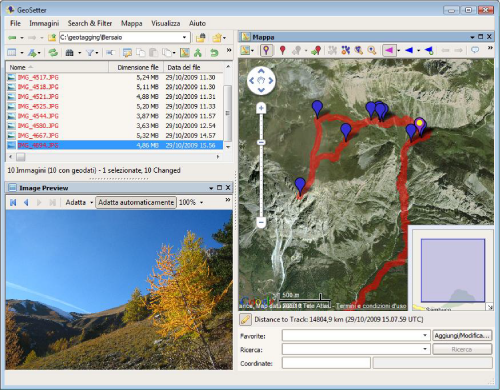
It’s done. Now we just have to save clicking on Images -> Save changes.
Now that the photos are geotagged we can upload in one of the many sharing soft wares and online services as Panoramio, Flickr, Picasa, etc. able to interpreter geographical coordinates to share with friends or everyone.
Really interesting, isn’t it?